Personal Assistants
AI-School offers the ability to set up personal assistants. These assistants can be text-based for chat conversations, or voice-based for spoken interactions. A personal assistant can be, for example: 'History Teacher', 'Letter Writing Assistance to Parents', or a language coach for speaking practice.
Text-based Assistants
Setting Up Assistants
You give the assistant a name and then set the initial prompt and system prompt that belongs to the assistant.
The initial prompt is literally the first question you ask in the chat. This field can also be left empty.
The system prompt works in the background to guide the AI's behavior, and you can use this to provide useful background information (context). For example, to give instructions about style or provide background information.
Working More Efficiently
You can set an initial prompt, system prompt, and a model for an assistant. So if you often need to perform a task using AI, you can set this up well and reuse it repeatedly.
Example 1 - Letter Writing Assistance
You regularly need to send letters to parents. You've noticed that a Claude model gives good results for this. You set this model for the assistant. There is no initial prompt, as your first question is always different. Settings:
- Name: "Letter Writing Assistance to Parents"
- Initial Prompt: leave empty
- System Prompt: "You are a writing assistant. I want to send letters to parents of students at our school (primary education). The text should be informative, in a friendly tone. We address parents in the 'you' form. Here is a good example of a letter: (PASTE THE ENTIRE TEXT OF THE LETTER HERE) Do not use this letter for content, but only for writing style."
- Model: a suitable Claude model
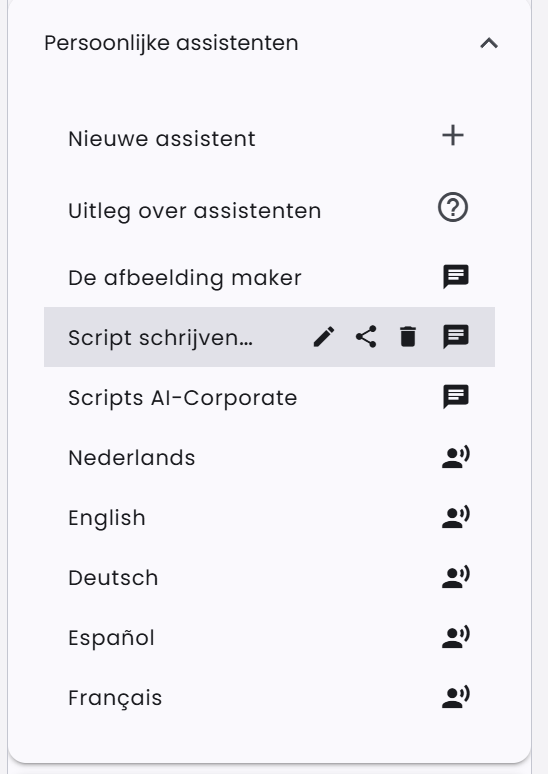
Managing Assistants
You can manage personal assistants by clicking on "Personal Assistants" in the dashboard. Here you can create, edit, and optionally delete assistants.
Chatting with an Assistant
You can easily start a chat with a personal assistant from the dashboard.
Example 2 - Active Teaching Methods
As a teacher, you often want to prepare lessons using active teaching methods. You've found 10 great active teaching methods online at: https://www.coachingvoordocenten.com/10-activerende-werkvormen-om-les-boeiend-maken/.
You don't want to repeat these methods to the AI every time, so we're going to create a personal assistant for this:
-
Name: "Lesson with Active Teaching Methods"
-
Initial Prompt: "First ask me what I want to prepare a lesson with an active teaching method about, and what the target audience is. Also ask me how long the active teaching method should approximately last. Only when you have this information, start working on creating a lesson plan. Then always give me 3 different plans with methods I can choose from."
-
System prompt: "Here is a list of 10 different active teaching methods. The teacher asks for help writing lesson plans. You always first request additional information before starting to create a lesson. You then always choose 3 options yourself that best fit the subject and target audience. These are the active teaching methods:
Active Method 1: Think-Pair-Share
The first of the active teaching methods is the think-pair-share principle.
- Students receive a question, problem, or task from the teacher and are given some time to think about it individually.
- After this, students share their solutions with each other and can adjust their own solution.
- Share: now the teacher designates different students to give their answer or put their solution on the board. Other students are regularly asked for comments.
Active Method 2: Expert Groups
There is a central question or assignment usually posed by the teacher. The teacher divides this complex assignment into as many good sub-questions/assignments as needed for each group. Individual members of each group answer their own sub-assignment. They are now the expert for that part of the assignment within their group. The expert now presents their knowledge to the other members of the group. This is repeated for the other experts. After this, the entire group has become expert for the entire assignment. The teacher checks by asking random members of different groups questions.
Active Method 3: Group Roles
Students can receive roles during group work. Each group member thus becomes responsible for their own task. This structures the contributions of group members and makes the chance that a member 'free-rides' on the efforts of other group members considerably smaller.
Examples of roles:
- Writer: writes and notes
- Organizer: divides the work among group members
- Questioner: is the only one who may ask the teacher for help
- Materials Chief: brings and fetches the needed materials
- Timekeeper: keeps track of how long they may spend on different parts
- Checker: verifies if everyone understands the assignment or processing
- Cheerleader: ensures everyone keeps their spirits up
- Referee: decides in case of disagreements
- Researcher: is the only one who may consult reference works
- Critic: is the only one who may ask difficult questions
- Executive: is the only one who may perform practical actions
- Informant: is the only one who may go to other groups to check answers or get ideas
- Calculator: operates the calculator and checks the answer
Depending on what the assignment is, you look at which roles are applicable.
Active Method 4: Color Test
Make sure each student has 3 colored cards on their desk. First, you give instruction to the class or show an instructional video. Then you ask various questions to the class about the material where they can choose from 3 multiple-choice answers. Each color represents a certain answer. After asking the question, all students hold up the color of the answer they think is correct.
Active Method 5: Completing Sentences
The teacher consistently leaves 'gaps' while explaining. The student must fill in the gap in the sentence. That gap can, for example, refer to a formula, a device, an example, a cause, a concept, a brief explanation, or a conclusion. The student fills in the gap individually first, then compares it in a group. Finally, the students' findings are discussed as a class to find the best 'answer'.
Active Method 6: Something to Ponder About
Ensure that when students enter the classroom, 1 or more photos are shown with the projector. These photos should have a connection related to the goal or subject of the lesson. Upon entering, students will immediately wonder what the photos mean and what the connection is.
Active Method 7: Find the Mistake
The teacher provides a text containing various errors. These can be textual errors in language or wrong conclusions in geography or incorrect formulas, etc. Students must jointly remove the errors and improve the text.
Active Method 8: Question and Answer Chain
The first card, for the teacher, has the first question. It's useful to mark this card. The teacher asks the question on the card. One of the students has the answer to the question written on the back of their card. The student with the answer to the first question turns their card over and reads the second question. And so on. The last answer is again on the teacher's card. The number of cards must be at least equal to the number of students in a class. There can of course be more. The first time, this method doesn't go very fast yet, but a second time the teacher can time it and encourage the class to achieve a fast time.
Active Method 9: Make a Game
For example, you can make memory with concepts and descriptions, or words in different languages. Or with opposites or problems with answers, etc. You can also play 1 against 100 where you cover the material. Hats on, hats off is also a game that students can appreciate.
Active Method 10: Student as Teacher
The last of the active teaching methods is the student as teacher: A student receives the assignment to give a class-wide explanation the next lesson, a week later, with some guidance. The student and the class know that the student replaces the teacher's explanation. In this way, the student-teacher prepares well, the students listen well to the explanation. Especially if they also have to give a grade for the explanation. If the explanation is below par, the teacher can still make necessary additions in the follow-up discussion."
-
Model: Suitable OpenAI models
Voice-based Assistants
Voice-based assistants make it possible to communicate with the AI through speech instead of just text. This function makes it possible to have natural conversations with the AI in different languages, which is particularly useful for language education or when you simply prefer speaking to typing.
Voice chat supports two voice models: OpenAI Realtime 1.5 and Google Gemini Live.
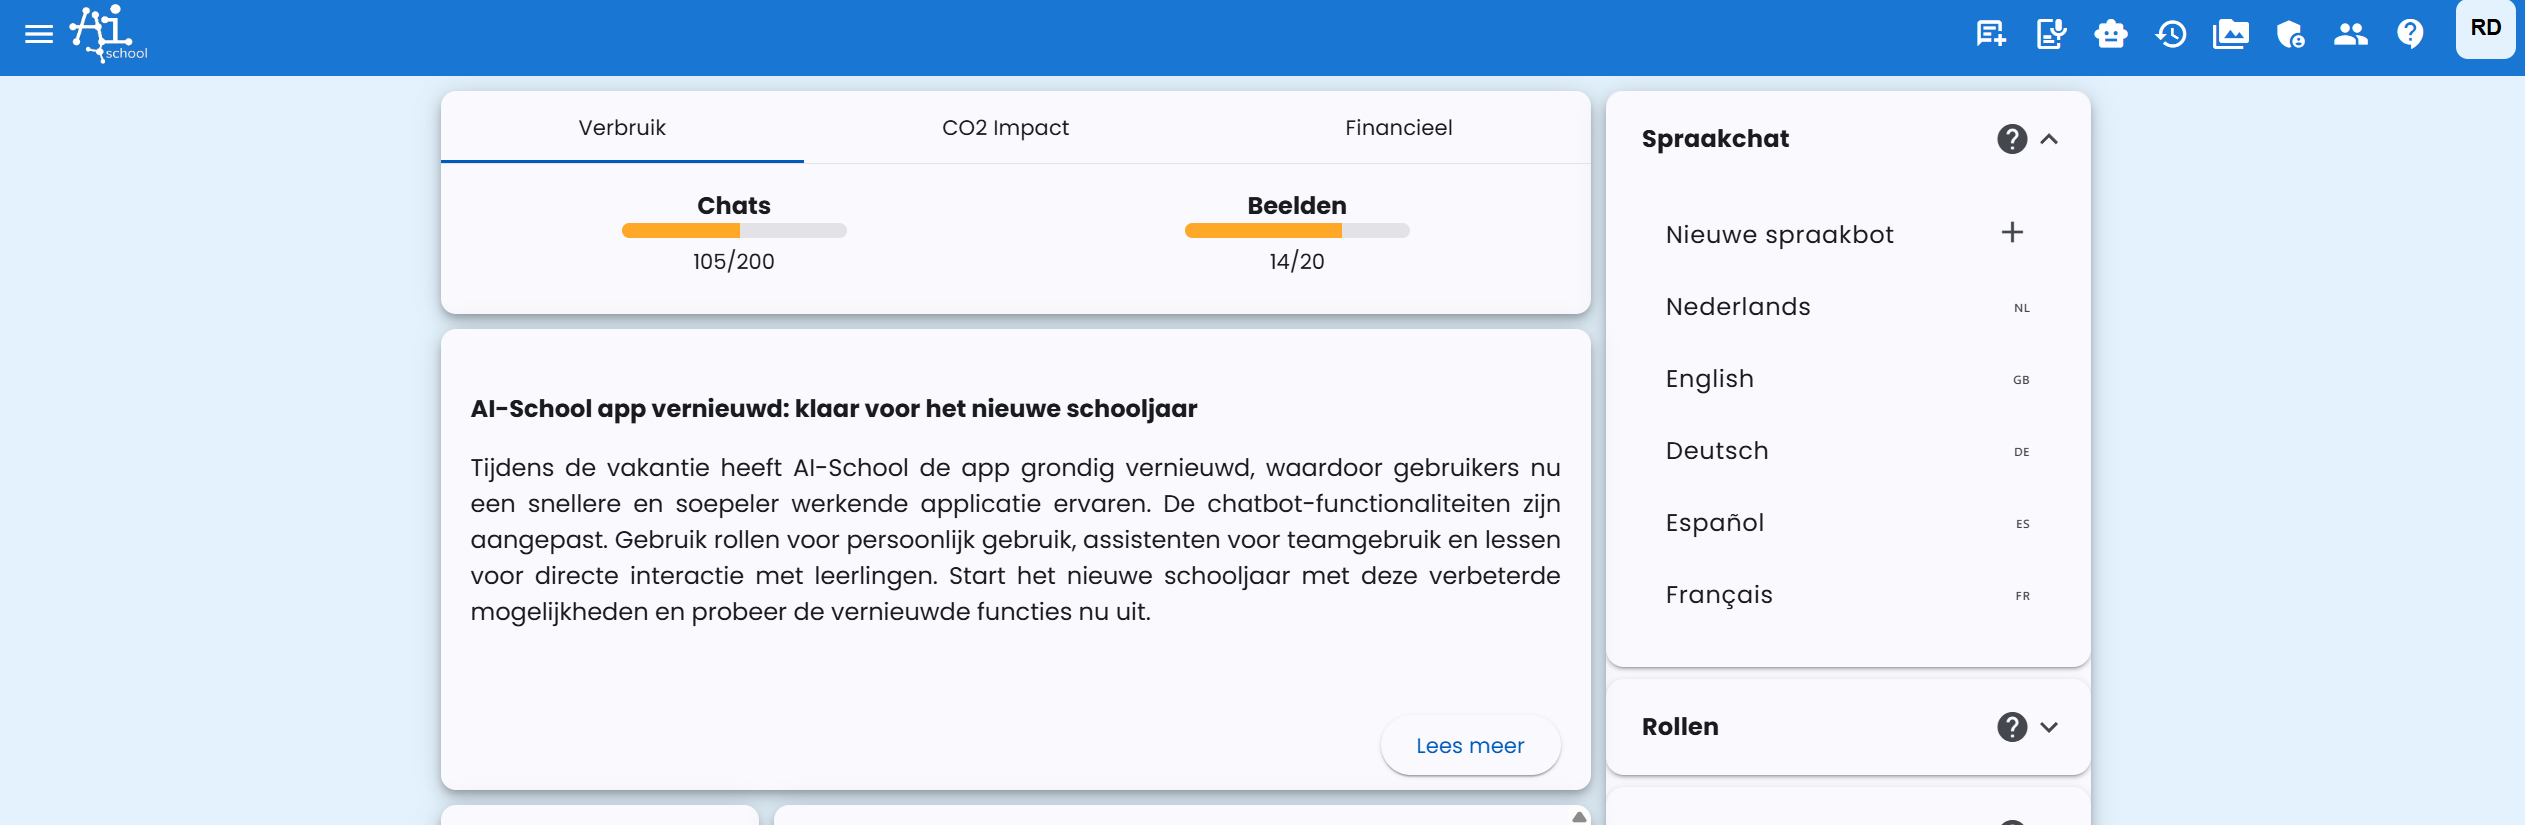
Access to Voice Assistants
Voice assistants are not available by default for all users. This function is managed by the administrators of the board or school. If you have access to voice assistants, you will see this on the AI-School dashboard in the Personal Assistants section.
Starting a Voice Assistant
Selecting a Language
You can use voice assistants in different languages:
- Dutch - Convenient for natural conversations in your native language
- English - Ideal for practicing your English speaking skills
- German - For learning or practicing German
- Spanish - For Spanish speaking practice
- French - For French conversation exercises
This multilingual functionality makes voice assistants particularly valuable for language education, as students can practice their speaking skills in a safe environment.
Activating a Voice Assistant
After you've chosen a language, you see that the voice assistant is ready for use:
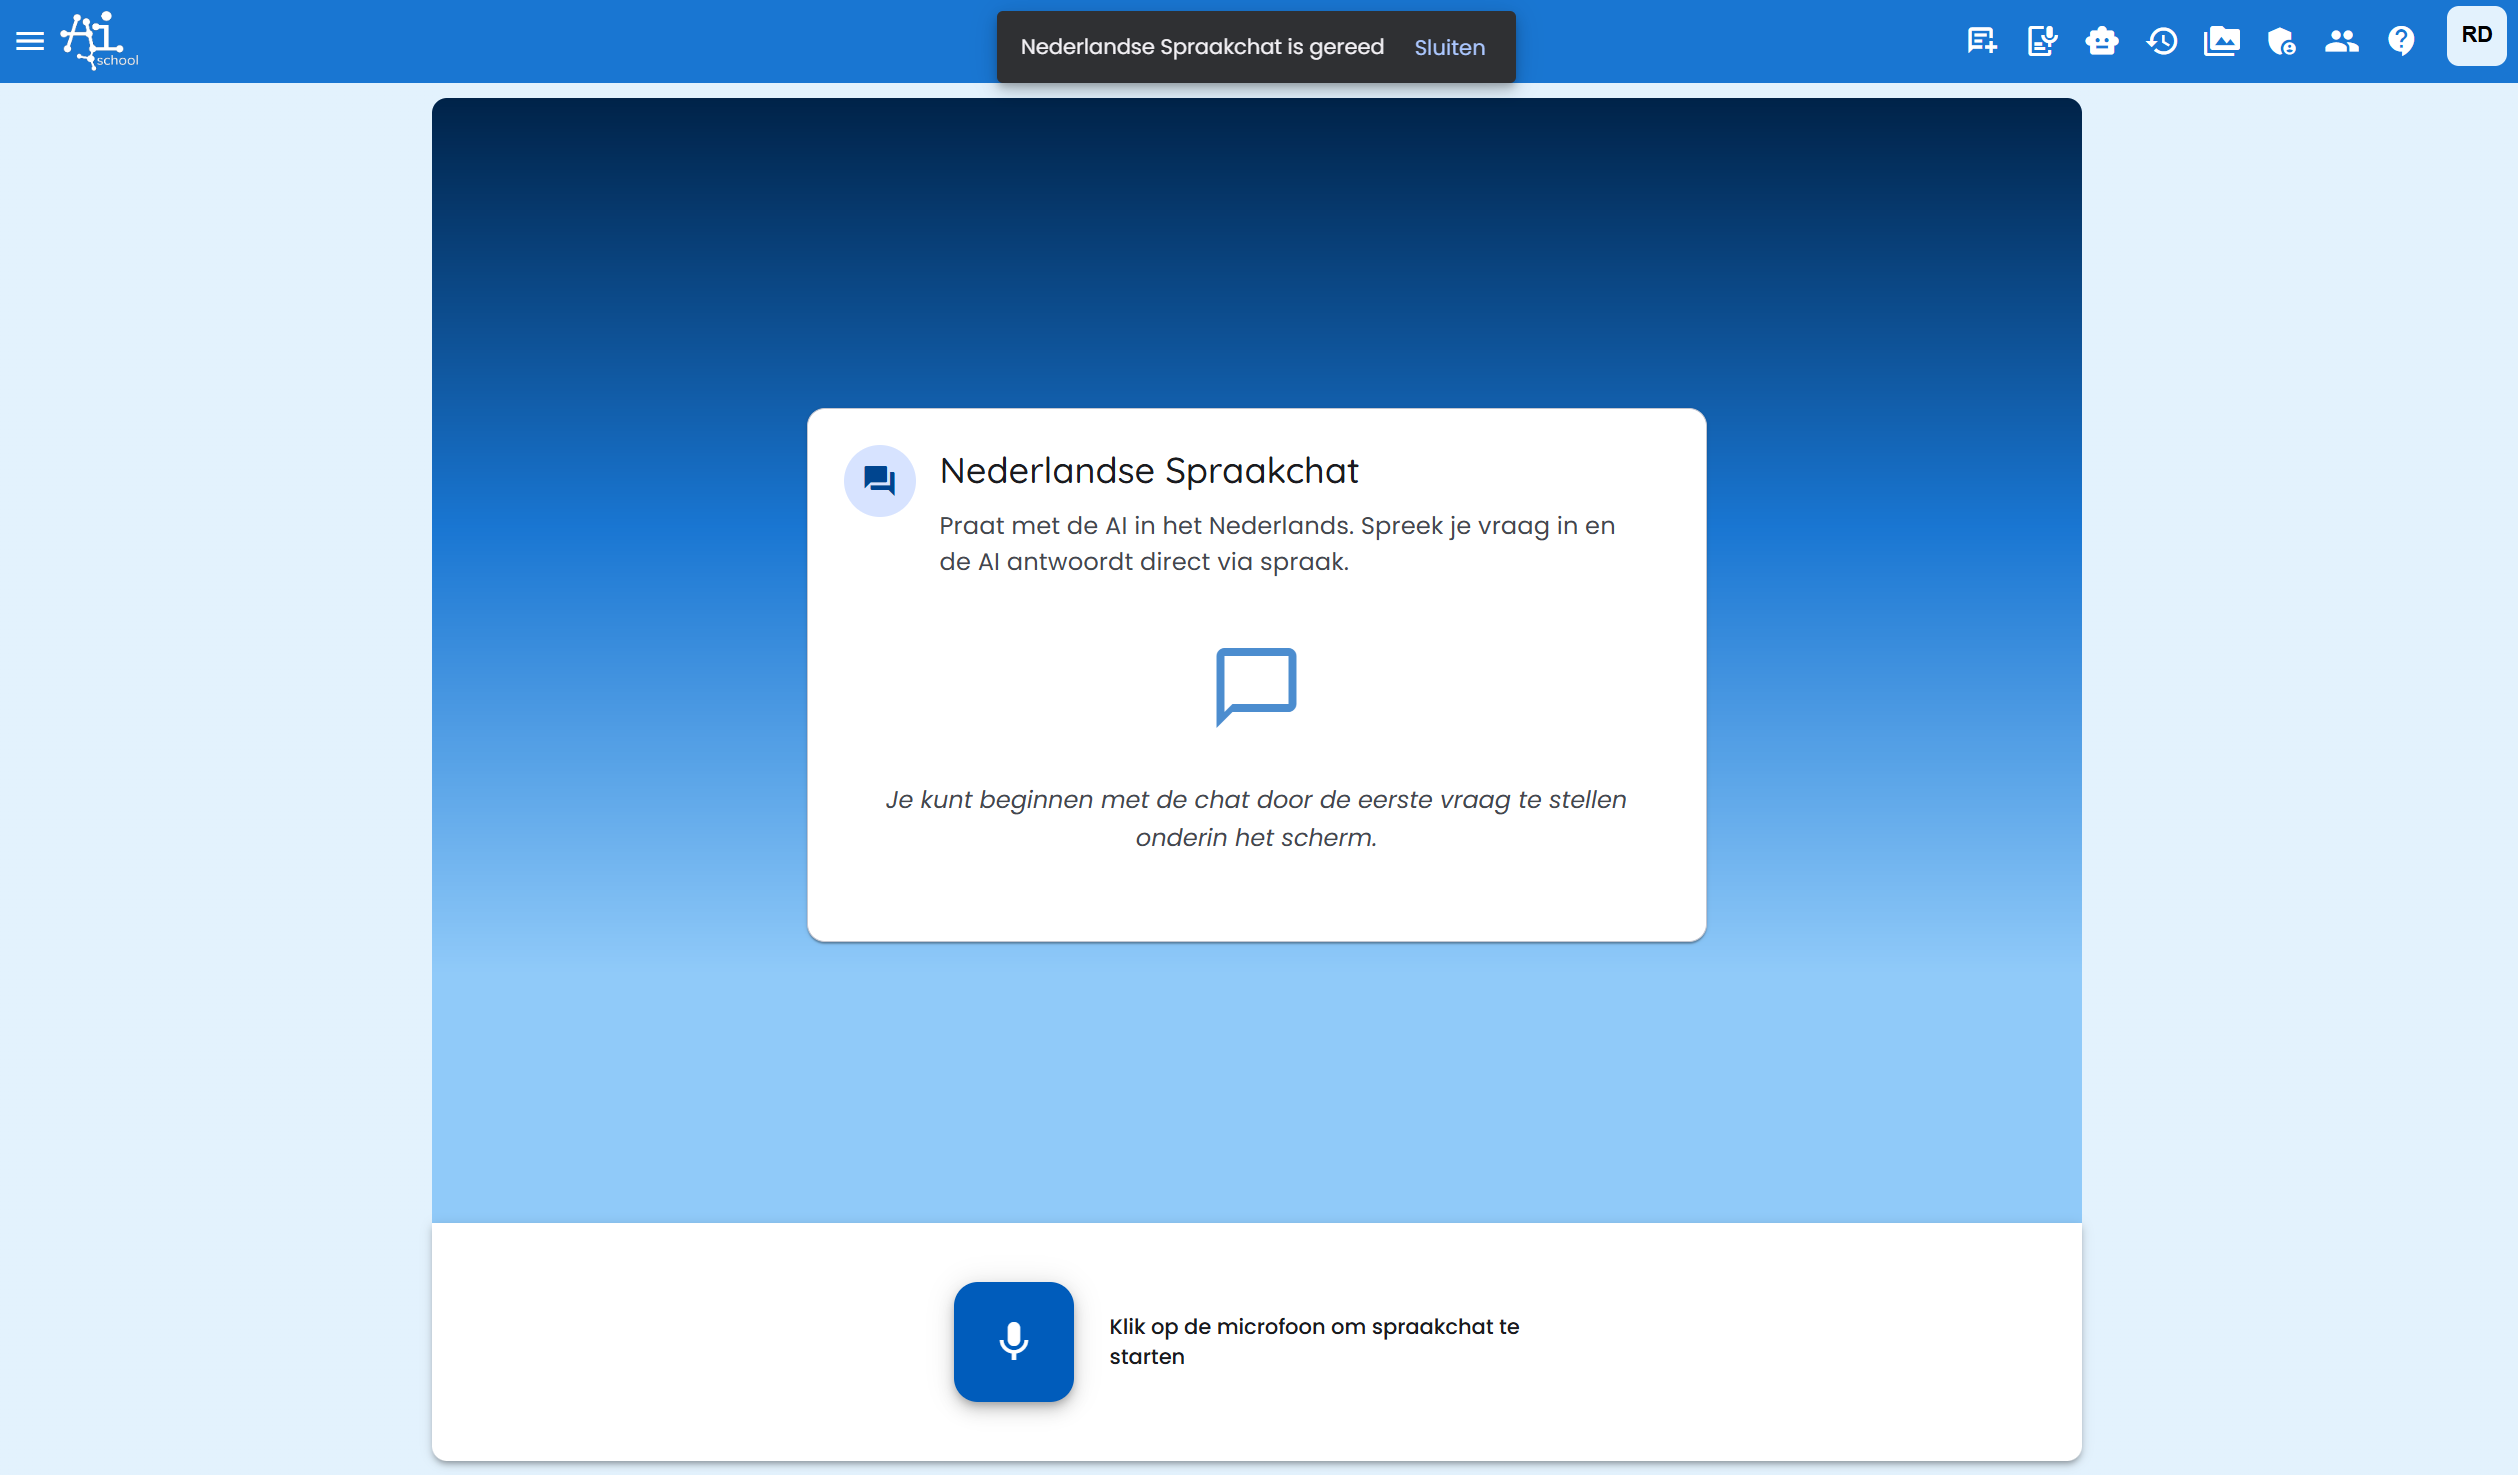
In this screen you see:
- A welcome message that explains how the voice assistant works
- The selected language (in this example: Dutch Voice Chat)
- Instructions to start chatting
- A microphone button at the bottom of the screen
Using a Voice Assistant
Starting a Conversation
- Click on the microphone button - This is located at the bottom of the chat window
- Wait for connection - A connection is briefly established with the selected voice model (OpenAI Realtime 1.5 or Gemini Live)
- Start talking - Once the connection is ready, you can simply start talking
During the Conversation
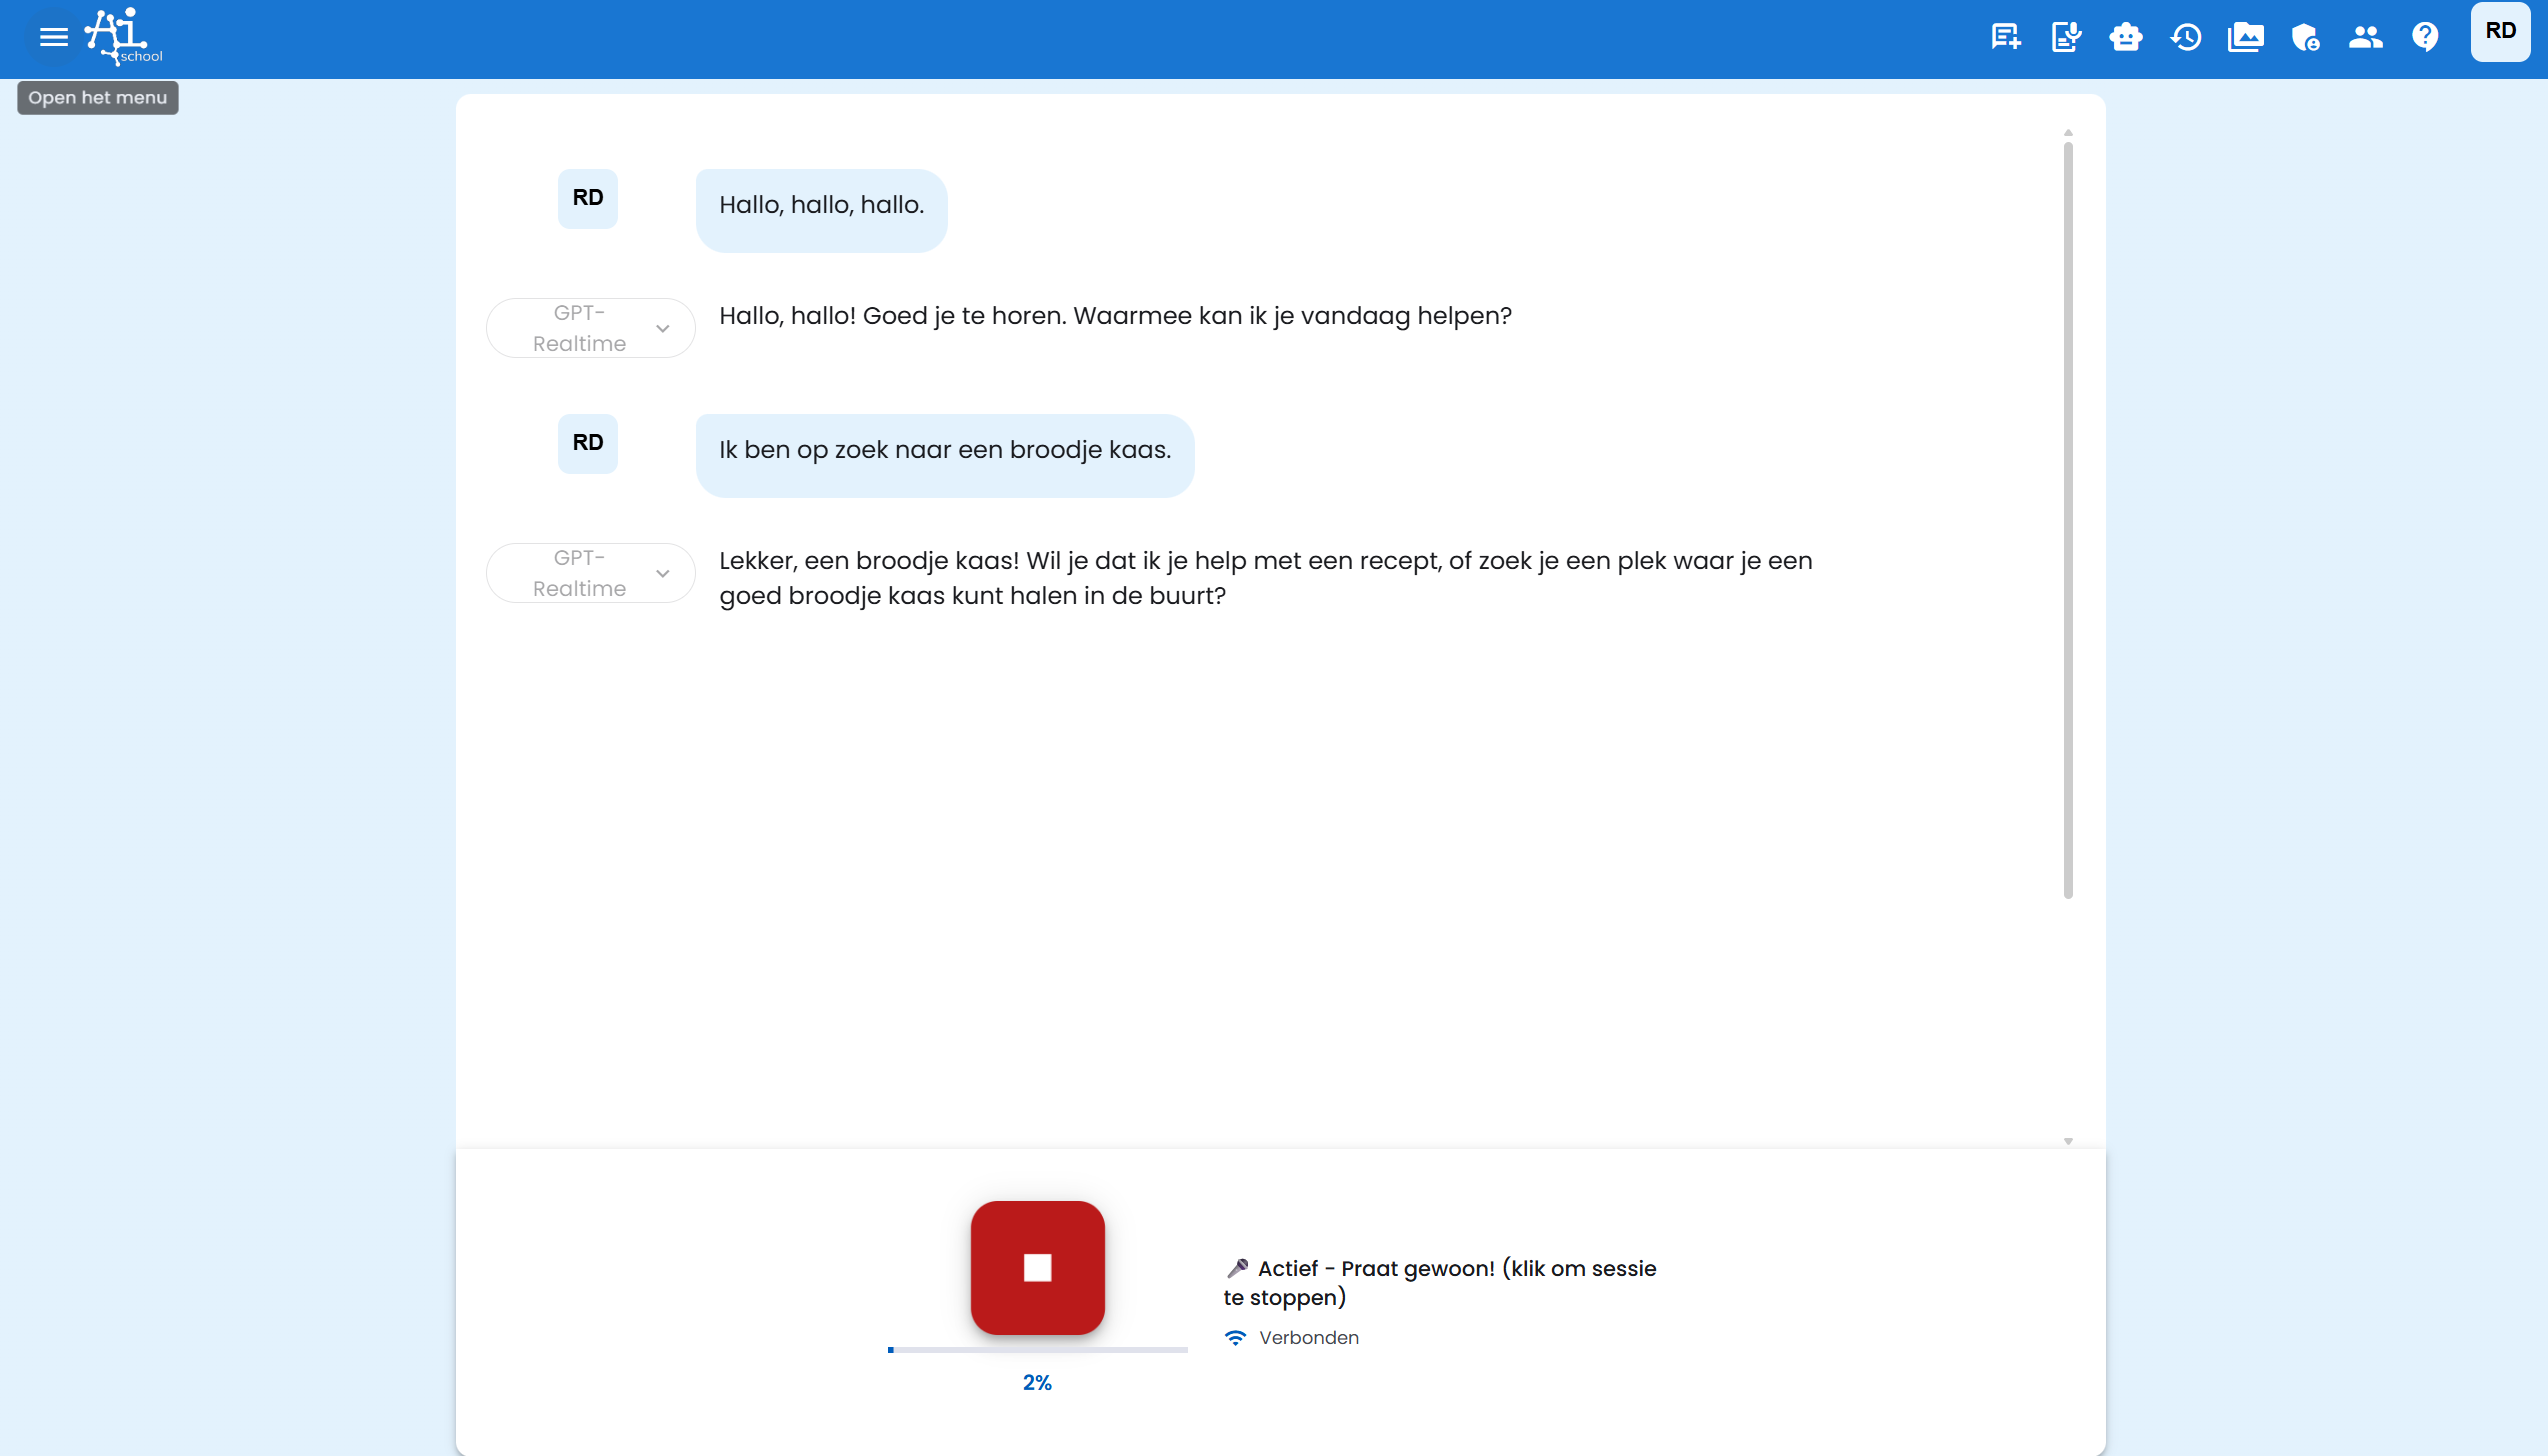
When the voice assistant is active, you see:
- Your spoken text is automatically transcribed and appears in the chat window
- The AI processes your spoken words and gives an answer
- The AI's answer is shown both as text and spoken
- A stop button to end the voice session
Benefits of Voice Assistants
- Natural communication: Talking feels more natural than typing
- Language education: Ideal for practicing pronunciation and listening skills
- Accessibility: Convenient for users who have difficulty typing
- Multitasking: You can do other things while talking
- Faster interaction: Speaking often goes faster than typing
Setting Up Your Own Voice Assistants
In addition to using the standard voice assistants, you can also set up your own voice assistants on the dashboard. This gives you the opportunity to:
Create Custom Voice Assistants
- Set system prompt: Determine how the AI behaves and what role it plays
- Choose voice model: Choose between OpenAI Realtime 1.5 and Google Gemini Live
- Choose voice: Select different voices for your voice assistant
- Gemini settings: With Gemini Live, you can also set a Gemini voice and Gemini language code (BCP-47)
- Configure language: Set the desired language for your assistant
- Specialization: Create assistants for specific subjects or purposes
Applications for Custom Voice Assistants
- Subject-specific assistants: Create a voice assistant specialized in mathematics, history, or other subjects
- Language coaches: Develop assistants specifically focused on language education
- Role-playing: Create assistants that can play historical figures or characters
- Practice partners: Set up assistants for presentation practice or conversation training
Tips for Effective Use
For Students
Text-based assistants:
- Experiment with different system prompts to get the best results
- Save frequently used assistants for later use
- Share useful assistants with classmates (if allowed)
Voice assistants:
- Speak clearly and at a normal pace
- Use the voice assistant in a quiet environment for best results
- Experiment with different languages to develop your multilingualism
- Ask open questions to stimulate interesting conversations
For Teachers
Text-based assistants:
- Create assistants for frequently recurring tasks such as writing letters or lesson preparation
- Share effective assistants with colleagues
- Use specific system prompts for different subjects or levels
Voice assistants:
- Integrate voice assistants in language education for speaking exercises
- Use custom voice assistants for role-playing in history lessons
- Let students practice presentations with the voice assistant
- Create subject-specific voice assistants for extra support
Technical Considerations
For Text-based Assistants
- Save complex system prompts in a separate document for reuse
- Test different AI models to see which works best for your specific task
- Update assistants regularly based on experiences
For Voice Assistants
- Ensure a good internet connection for optimal speech recognition
- Use a headset or external microphone for better audio quality
- Voice assistants work best in a quiet environment without background noise
- The function requires access to your microphone, ensure this permission is enabled
- For Gemini Live, preferably use an appropriate BCP-47 language code per assistant for consistent voice output
Personal assistants open new possibilities for more efficient work and interactive learning, and make AI-School even more accessible and user-friendly for all users.