Managing Students
After adding groups, students can be added per group. In the toolbar, you'll find a switch to toggle between groups. You can best interpret groups within AI School as base groups. A student must be linked to a base group in the system. This link, in turn, ensures the connection with the correct school.
Manual Addition
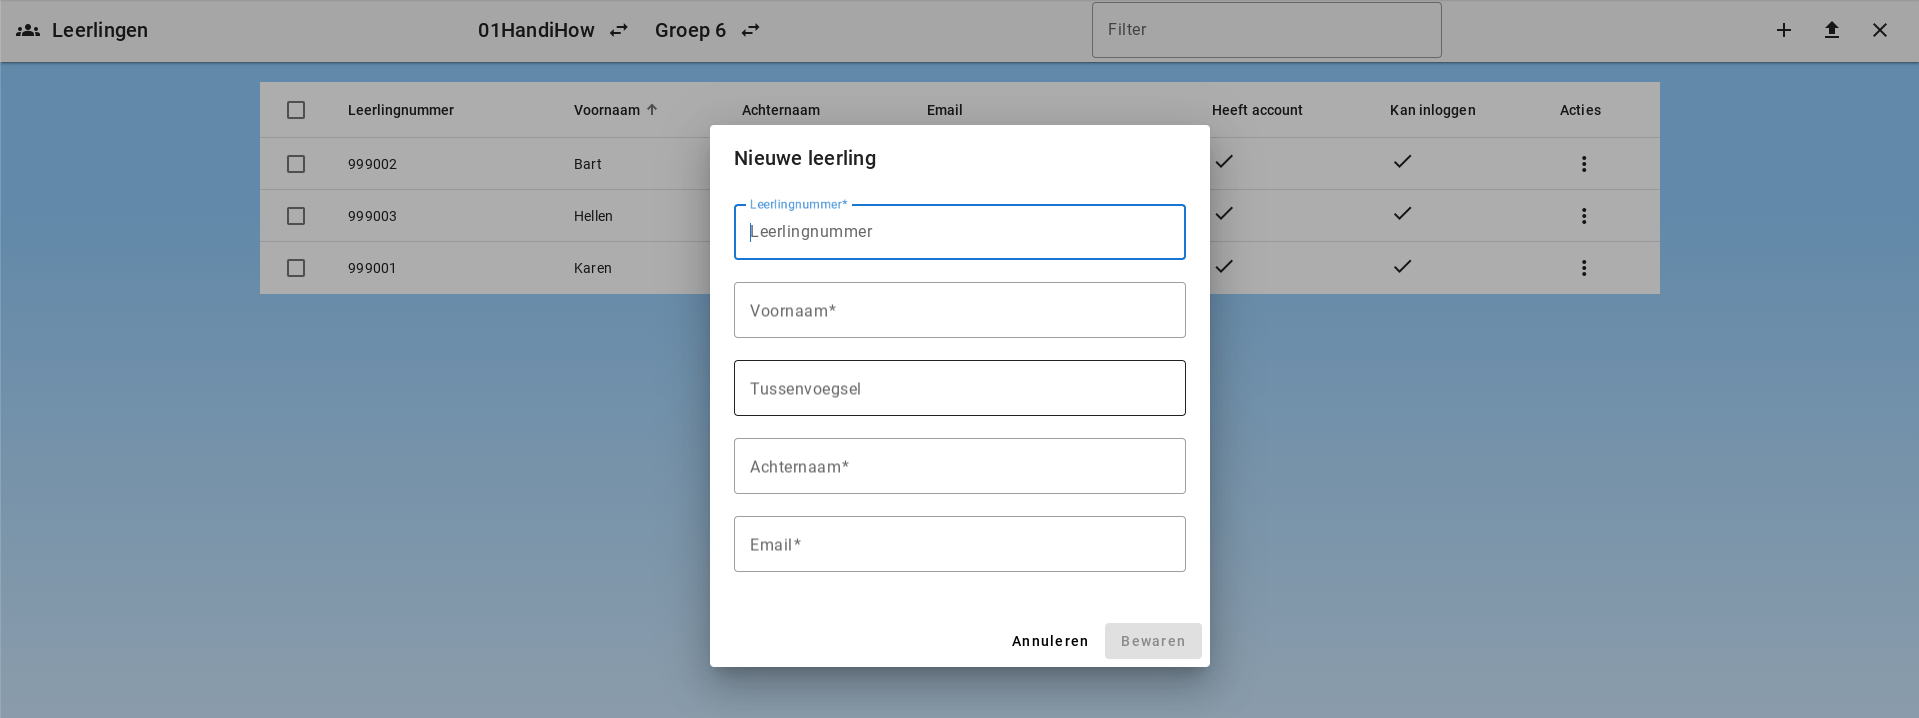
The administrator can add students one by one using the plus button in the toolbar.
Adding Students via CSV File
Students can be uploaded via a CSV list. The list must have 5 columns for student number, first name, prefix, last name, and email address. The list may not contain column headers.
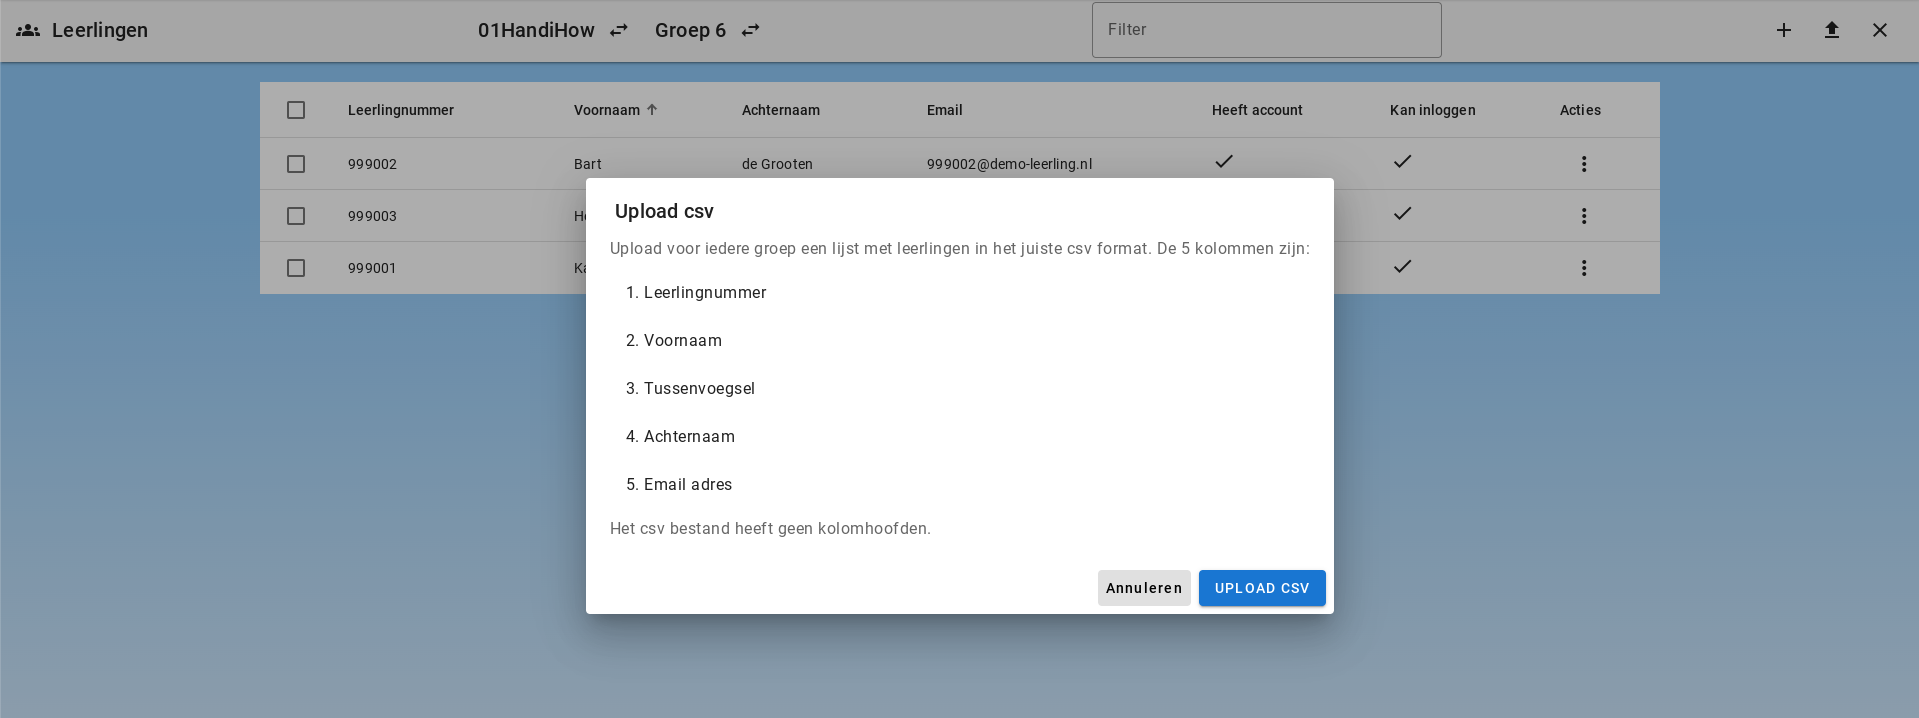
The column with the email address is important. If a student is uploaded to multiple groups, the records will be merged based on the email address. A student will then be linked to multiple groups.
Creating Students via Domain Whitelisting
Students can also be automatically created by whitelisting domains. When a student logs in with an email address belonging to a whitelisted domain, an account will be automatically created for them and linked to the correct group and school. This reduces the need for the administrator to manually create accounts.
For more information, see Managing Domains.
Editing a Student
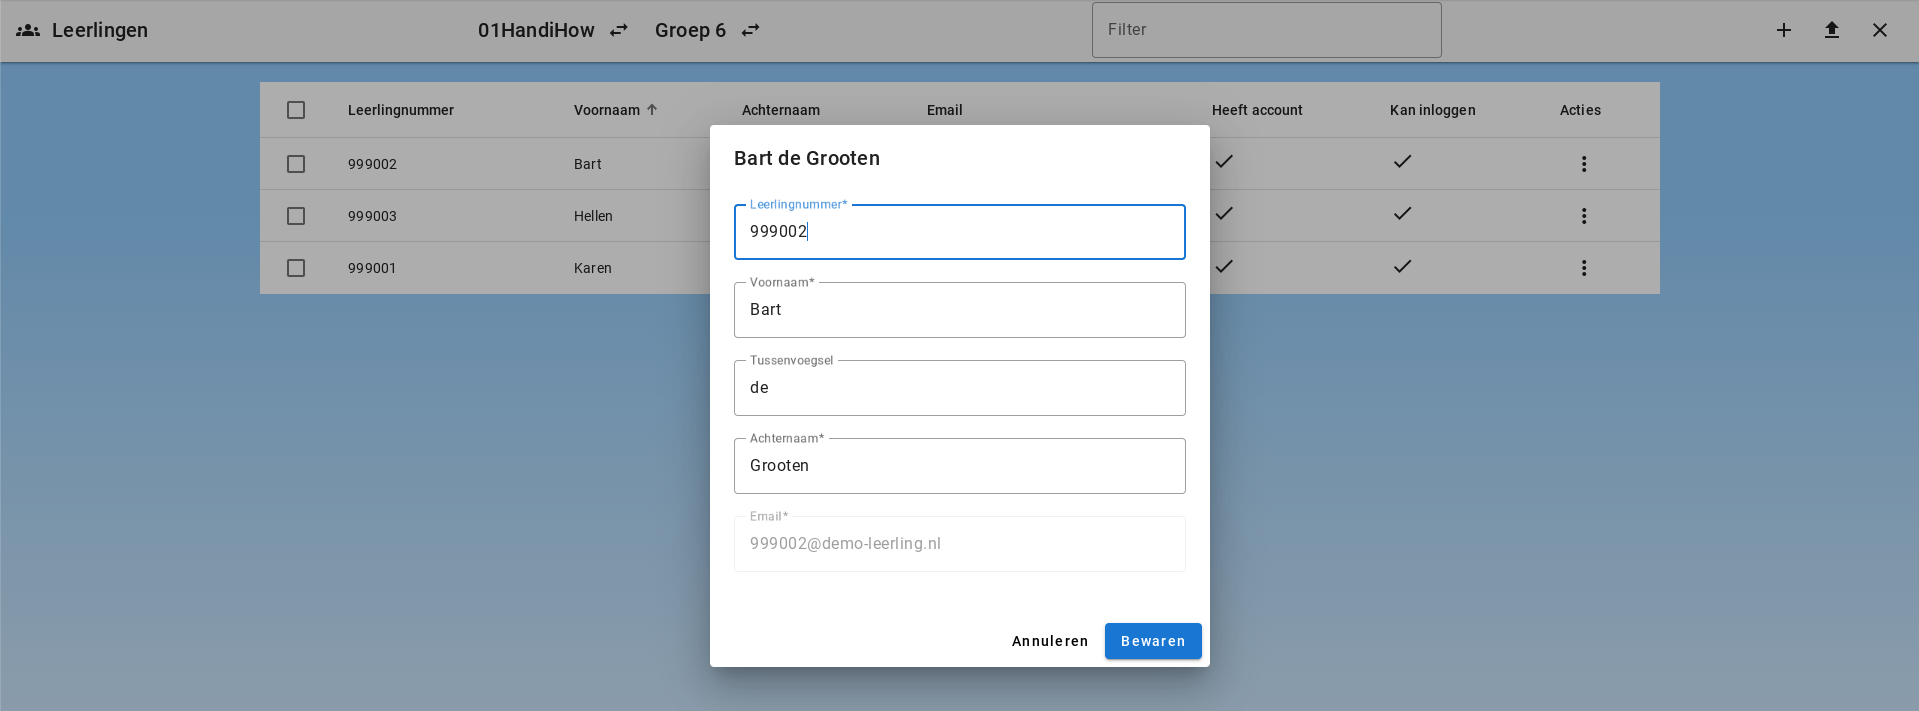
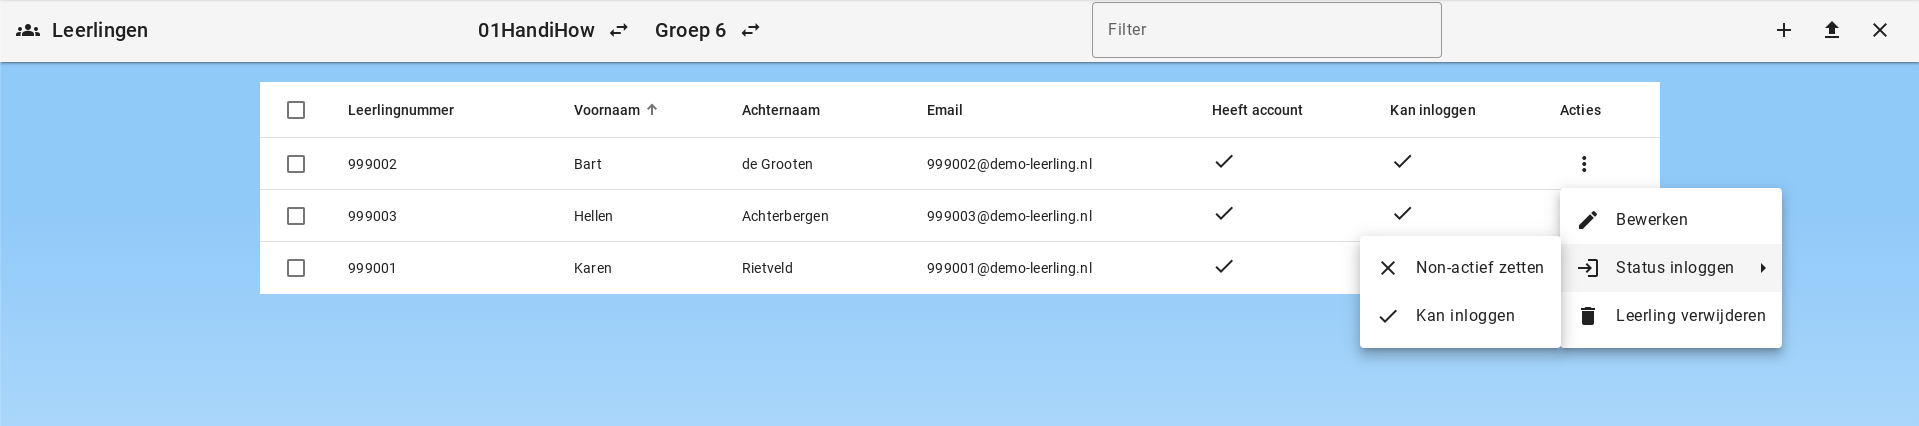
The student can be edited by clicking "Edit" under Actions.
The login status of a student can also be updated. The student can be set to non-active.
Account Creation
Accounts are automatically created after a successful first login attempt. During account creation, tokens are added on the server:
- student (yes/no): set to "yes" if the email address matches an email address on the student list
- employee (yes/no): set to "yes" if the email address matches an email address on the employee list
- admin (yes/no): always set to "no" when the account is first created
- board admin (yes/no): always set to "no" when the account is first created
- super admin (yes/no): always set to "no" when the account is first created
These tokens are later linked to Permissions. Permissions are set by the administrator. These define the rights assigned to each role.
Removing a Student
When removing a student, there are several scenarios:
- The student has never logged in and therefore has no account
- The student has an account and is placed in multiple groups
- The student has an account and is placed in only 1 group
Student Has No Account
If the student has no account, the student record will be deleted. Since there is no account and no data, nothing further needs to happen.
Student Has an Account and Is Placed in Multiple Groups
If the student is removed from a group, that group will be removed from the linked groups, and the student will disappear from the list of students in that group. However, the record and related account will remain. The student is still active in one or more groups.
Student Has an Account and Is Placed in Only 1 School
If the student is removed from the only group where they are active, the student record will be set to non-active. The account and all data will remain, but the student can no longer log in. To permanently delete the student, the account must be deleted.
Deleting an Account
When deleting an account, the following steps are automatically taken:
- Chats and chat messages will be deleted
- Files and related documents will be deleted
- The employee or student record will be deleted
- The account record will be permanently deleted from Firebase
Retention Period for Students
Students are automatically deleted after the retention period set in the environment expires. The default is 8 years.